Make Your Own Basil Infused Pasta

I was a little nervous at the idea of making pasta, especially when it came time to use the pasta maker. But after that first batch, I am confident in saying - that nervousness was all for nothing! The process of making pasta does have a few 'steps' - however the end result is worth all the effort.


Ingredients: this makes about one pound of pasta

- 2 1/2 to 3 cups Semolina Flour

- 3 Eggs, at room temperature

- Water

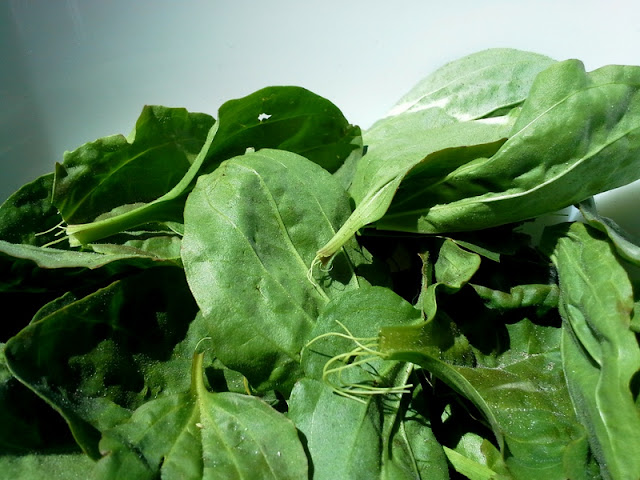
- 3/4 cup of Fresh, home grown Basil - washed and air dried

Directions: 

- Form a flour mound with the two and half cups semolina, then form a basin in the middle to receive the eggs.

- Crack the eggs into the basin and slowly start working the flour into your eggs, mixing and kneading by hand - until you form a soft dough ball. This may take eight to ten minutes. * If  your dough feels too dry add some water - a few drops at a time. Until a pliable ball forms.

- Wrap the dough in plastic wrap or place into glass bowl with lid. Let it rest for at least thirty minutes. 


- After the rest, divide the dough into quarters and make into balls, cover the remaining balls that are not in use during the next step.

- Rough flatten your dough piece and run it through your pasta roller, which is to be set on the thickest setting. Fold this dough in half after running it through once, then run it through again. Change the setting to the next setting in line, and repeat this process again - resulting in four passes, two folds and two settings on your machine.

- Next lay your pasta sheet flat and place the air dried basil on the pasta in random places and angles. Going half way in length. Then fold over the remaining half pasta sheet. * The amount of Basil used here is based on personal preference, you can use more or less - depending on desired flavor you would like to achieve.

- Then pass this pasta fold through your roller, on the last setting you used. Take care not to pull your pasta as it passes through the roller. If the pasta is too thick for this setting, set the roller back one and run it through once, making one roller adjustment - and pass through a second time.

- Repeat the process with the remaining pieces of dough, laying the completed pasta sheets out on a floured surface while you are working the others. 


- After all of your pasta sheets are completed, run each one though the noodle adapter or cut into rough noodles by hand. At this point you can hang your pasta to dry or... make Alfredo.


Take a moment and enjoy your home made, basil infused pasta with someone you love... and did you know that Basil provides nutrients such as calcium, magnesium and vitamin K along with a variety of antioxidants. So go ahead - grow that Basil!


Five Notes on Herbal Dosing & Home Preparations

The topic of dosing can be a somewhat controversial subject among modern herbalist. Often times being one the biggest challenges for an herbalist to face. With the numerous herbal preparations, blend potentials and the various dosing guidelines – it could leave one wondering how to choose the best method for success. But the need to address dosing should not be ignored and here's why:


Five Reason's You Should Not Disregard Dosing:
 
  • The standardization of herbal remedies use what is called the '150 pound rule'. Meaning that the recommended doses on the bottle of a standardized supplement are for those individuals weighing an average of one hundred fifty pounds. This means if you weigh more or less than that weight, you will need to dose up or down for the herbal remedy to keep it's standardized effectiveness. Unless otherwise noted.
  • Children offer a whole new complexity. For this reason, there are a variety of 'rules' known among herbalists regarding dosing. I personally am focused on two, attempting to commit them memory, as well as keeping them handy for reference. These are known as Clark's Rule and Freid's Rule - you can read more about pediatric dosing guidelines and the formula here. Freid's Rule – similar to Clark's – is for infants and small children.
  • Counting drops doesn't always offer the same precise measurement and dose. This is because a drop can vary in remedy strength, due to dropper size and liquid viscosity. It's often fine for home use, with safe herbs. However, it's wise to remember that it is not precise and that drop dosing, when used, should be utilized in the metric system. 
  • No concern for the strength of a herbal remedy, the quality of the herbal matter or even accurate dosing can result in either dangerous overdosing or inadequate usage. One factor at play here is the use of whole herbs vs. liquid extracts. Whole herbs must first be broken down by the digestive system before they are available for the body to use. The bodies ability to break down the herb effects the bodies ability to absorb the supplement. This is just one element to consider when dosing and/or making preparations. 
  • The method of extraction is another important factor to consider in dosing, one reason for this is because using alcohol with water-soluble compounds, such as mucilage or tannins, creates a dilution in the alcohol. Resulting in a lower concentration or potency of the remedy. This in turn effects dosing.

These note highlights were from my first herbalist course, and I have carried them with me over the years. Solid reminders as I grow and a new season approaches. Encouraged by the next step in my herbal education.


Please Remember: I am not a Doctor, nor a Medical Advisor - these are simply educational notes from my own gleaning.

Homemade Coffee Filters & Simple Vanilla Syrup

For a season I worked as a Barista in a small coffee shop out west, I really really enjoyed that job. There is actually a lot to learn about coffee and the proper brewing thereof. I remember having to watch a video called Coffee 101, which was very similar to this style. In addition to having multiple hours of hands on training before I was allowed to fly solo. I am thankful for the instruction, even now, because you do not want to be the girl to mess up a Monday morning coffee fix.


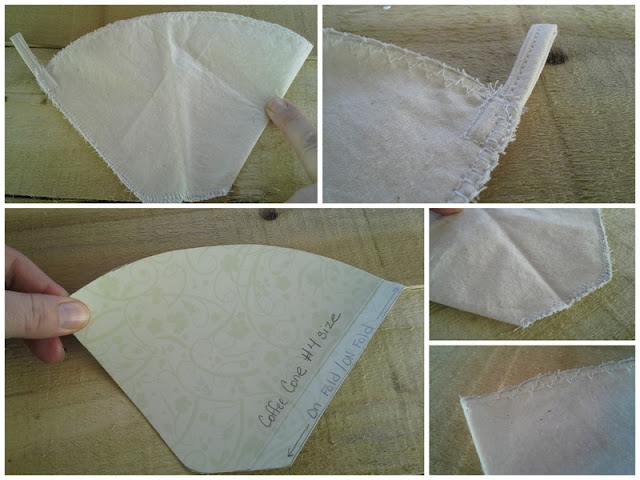
Now my coffee making endeavors are in the service of family, friends & hospitality and vary slightly in preparation. Recently I made up some reusable coffee filters for my coffee cone from some muslin - by simply tracing my last paper filter on the fold, and stitching along the sides. I then made a small loop hanger on one end, which allows for the filter to hang dry after rinsing. I also blanket stitched along the top of the filters to give a more finished look, which was done before the actual side stitching and the hoop addition.


I also like to use a cold brew coffee sock, like the one shown here. This was a gift from a friend, whom shared her pattern with me. This coffee sock fits a gallon or half gallon jar just perfectly. The sock measurements are approximate as shown in the photo - and the stitching is beautifully simple.


How I Make Cold Brew Coffee: you will need to play with the recipe to find your desired strength

~ Place about 1/2 to 3/4 cup of coarsely ground beans into your coffee sock, place the sock in the neck of your jar. Fill the half gallon jar with water, allowing the water to flow through the coffee sock. Draw up the strings to seal the sock and place the lid on the jar, with the sock string hanging out. Let rest for twelve to eighteen hours and remove the sock. Store cold brew in the fridge. Recycle the coffee grounds to the garden or compost. Rinse the coffee sock and hang dry.

Summer days I drink my coffee two ways - in the morning it's hot and bullet proof in composition. In the afternoon, if I desire a cold frappe or iced coffee I reach for my cold brew and touch it up with a little simple vanilla syrup. 


Simple Vanilla Syrup

½ cup coconut sugar
½ cup water
1 T vanilla extract

*Bring the water and sugar to a boil, simmer over low heat until thicker. Remove from heat and add your vanilla extract. Stir. Let cool and store in a glass jar in your frid - use as needed.

How to Make a Wall Mount Cast Iron Hanging Rack

I know I am not the only one who loves to spend time on Pinterest, so many ideas and inspiring how to's one could easily get carried away. But with a little discipline and budget wisdom, along with a strong do it yourself attitude... oh the possibilities!

I also know, I am not the only who appreciates good ol' cast iron. Though loving it as I do, I will confess it takes up a lot of space in my kitchen cupboards... and this is where Pinterest came in. It didn't take me long to find my inspiration. However, the link with the picture on Pinterest, did not lead me to the actual instructions for the hanging rack that inspired me. So - I did my best to recreate something similar, based on my preferences and a picture.


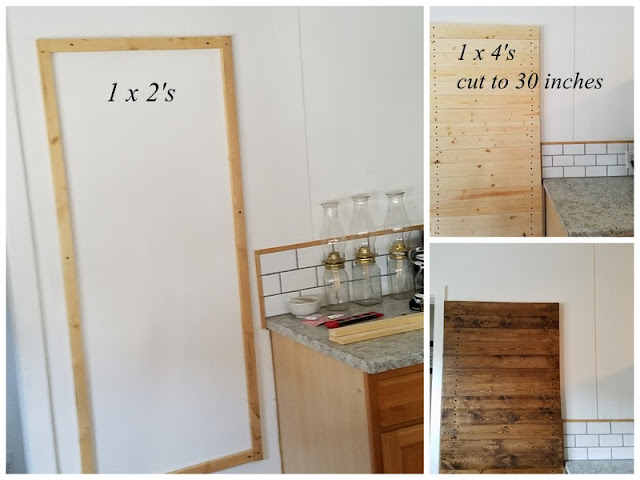
I decided to use 1 x 2's to form a base on my wall, the long sides are five feet in length, and the short top and bottoms are twenty inches. Each length side is screwed directly into the wall studs. Now before I go any further, I will say two things... one - I am NOT a carpenter, and two - the house is almost one hundred years old. :)

The 1 x 4 's are cut to thirty inches, then screwed into the one by two and wall stud - with two and half inch black screws. My local hardware store was having a special for all Pinterest projects, they were offering free services on things like; cutting the wood and threading my pipe. *Please, stain the wood before mounting to the frame, in a well ventilated area.


The pipe, the most pricey portion of this project, is a half inch in diameter. I used six feet total, being cut into two foot sections and threaded on each end. Add an elbow and floor flange to each end, then tighten everything down securely. Then, I spray painted them with a flat black, suitable for metal, spray paint.

Once they were dry, I mounted them on my wooden back drop - with the distance between them being relative to what I was going to hang. Meaning the bottom rungs are equally spaced, and the top rung intentionally has a smaller hanging space. I did this to help insure that the smaller cast iron was hung near the top and the heaviest pieces at the bottom.


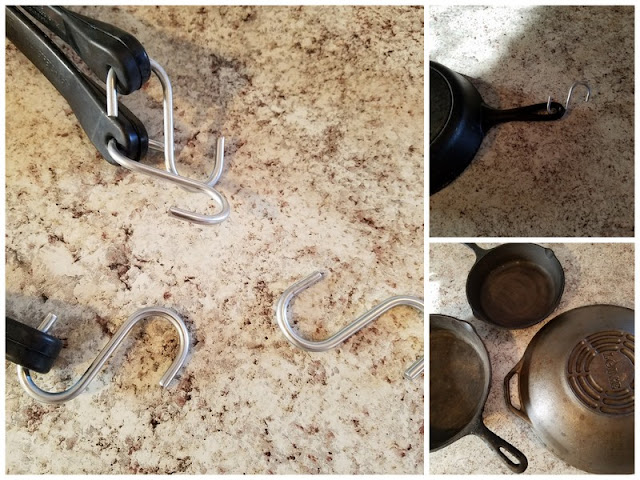
My hooks are from bungee cords. Yes, I could have ordered them from Amazon... but somethings I just prefer to work out locally. After visiting three hardware type stores, it clicked to give these a try. Sure enough, the hooks on a bungee cord fit perfectly on a half inch pipe, thus I spent about three dollars for six hooks.


In hind sight, I think I would like the wooden back drop flush against the wall, and possibly frame it in along the edges. But who's to say that won't come later, as this project has led to many ideas for our kitchen remodel.


Wall Mount Pinterest Idea's {HERE}

A Simple Effective & Natural Wood Sealant

My recent cast iron creative inspired me to use some of my effective and natural wood sealant, which honestly is just another variation of my wood balm recipe. But - it really is - effective and natural - so why not!

With this project I used 3 parts coconut oil and 1 part bee's wax, along with about 5 drops cedar-wood essential oil. Mainly for the aroma - I think, as I tend to have a preference for earthy, woodsy type essential oils in many of my home uses.


After I melted the coconut and bee's wax, I blended them together in a glass jar, then I  added my essential oil drops. Blending again. Then taking a soft, but sturdy cloth - I rubbed generous amounts of my natural sealant into the stained wood.

This really made the wood 'pop' and heighten the look of the flat black pipe, and hanging cast iron. Plus it smelled just - lovely. I love the small batches, not only cutting down on waste but time as well.


A Simple Plantain Poultice

Plantain was one of the first herbs my mama ever exposed me to, via a bee sting. This experience included saliva, a kiss and something that resulted in a green mushy paste. Like her, it was one of the first herbs that I exposed my little girl to.


It grows just about everywhere and is a 'foundation' herb in my home apothecary. During the season's of growth, I pick it early in the morning, before the sun has warmed the leaves to hot. Or in the evening, when the leaves have cooled to chill. Most of the time I dry them by laying them out flat after a quick rinsing bath.


When the harvest is dry, my herbal canvas is ready... then comes a cultivation of color in hues of green and oil. Nutrient dense, known for the ability to draw and to purify, powerful in standing alone or being supportive in teamwork.


For a Plantain Poultice:

You will need a handful of fresh, young plantain leaves. Or whatever amount is needed to cover the area where the poultice will be applied. Mush them. Unless it's very close family members, please do not put them in your mouth and chew them up to use... this should be reserved only for those mama's needing to deal with an issue quickly.

Trust me.

Next - apply this green mush to the affected area... and cover with a cloth wrap or bandage. After roughly thirty minutes, remove and repeat. Use as needed. I often buy cotton sheets from the thrift stores and wash them really well, dry them in the sun and then rip them into strips for this very use. 


Please Note: I do not treat, diagnose, nor imply disease/illness prevention. I am an herbalist and not a physician, my statements have not been approved nor evaluated by the FDA. I have received formal education from Vintage Remedies, and am currently saving my dimes to pay for my next learning experience.

Creating a Personal Materic Medica

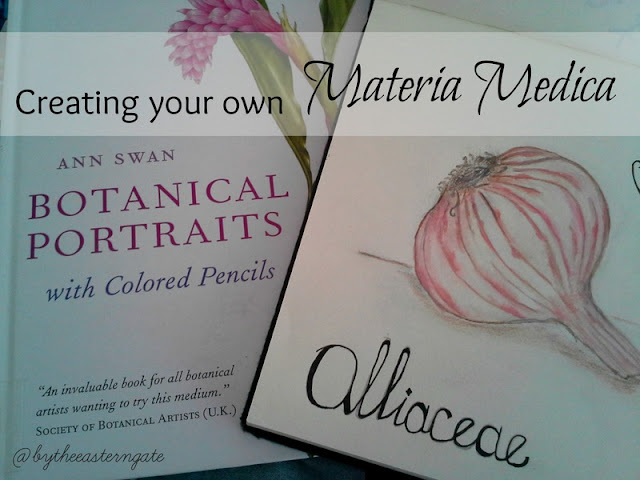
Between making a home and creating family goals for the upcoming year - I have been rekindling my herbal interests. Somewhere amid reading Homegrown Healing by Christine Dalziel and Botanical Portraits by Ann Swan desire and inspiration struck. Then when I signed up for the Herbal Academy's free Herbal Materia Medica course, that inspiration took hold of my dusty nature journal turned personal 'materia medica' and set my pencils to action.


Paired with a lettering reference from the local library and I had all the tools I needed to begin.


My art class instruction from high school is a bit rusty, but the joys of sitting with the botanical subject and creating a personalized medica and gardening journal has been so healing. This creative is also helping my educational recall and giving me steam to continue to save for my next course.

Have you began your own personalized materia medica?


Frankincense & Myrrh Foot Rub

Playing for me can be anything from gardening to creating herbals in the kitchen. It calms my mind and expresses the herbalist within my heart. Most of the time I create for others, little botanical treasures for health and hope. But this week I created a personalized batch Frankincense & Myrrh foot rub.


The Recipe:
  • 1/4 cup of shea butter
  • 2 T coconut oil
  • 2 T olive oil {or almond}
  • 1 T {about an ounce} beeswax, grated
  • 15 drops of Frankincense essential oil
  • 10 drops of Myrrh essential oil

Directions: melt the beeswax and shea butter over low heat, add the coconut & olive oil. Blend well. When completely melted, remove from heat source and add the essential oils. Blend again. Pour into a small jar or metal tin. Let cool & enjoy!

The Making of Dandelion and Plantain Salve

Dandelions have so many uses, besides being perfect for bees and other pollinators. A simple google search gives us plenty of ideas for creativity and education. However be wise and use discernment when picking a gleaning location, please stay away from areas with pesticide use and along side the road ways.


But Why Dandelion? {Taraxacum officinale}

Besides being widespread and easy to identify, Dandelions are easy to grow and semi easy to harvest. A win win for the beginner and the expert. All parts of the plant can be used, the root for things like - stimulating bile production and as a liver tonic, the leaf for things like - water retention and kidney problems. The flowers can be saute`d for dinner additions or in our case... used in a balm for sore muscles, chapped skin and stiff joints.

And Plantain? {Plantago major}

Again, plantain is wide spread, easy to identify and comes with multiple uses as well. Dandelion and Plantain are great herbs for children to learn basic salve making skills with as well as botanical identification. Plantain is my - most used - go to - for skin issues, because of it's ability to effectively nurture the skin as a whole. From fighting infection to drawing out skin toxins and soothing scrapes, bites and stings. Plantain is priceless. Together - they are gift to be reckoned with.

"Plantain also has styptic and hemostatic properties, meaning that it can help check bleeding." - Rosemary Gladstar, Medicinal Herbs - A Beginner's Guide, page 189

How To Harvest Dandelions & Prepare Them for Salve Making:

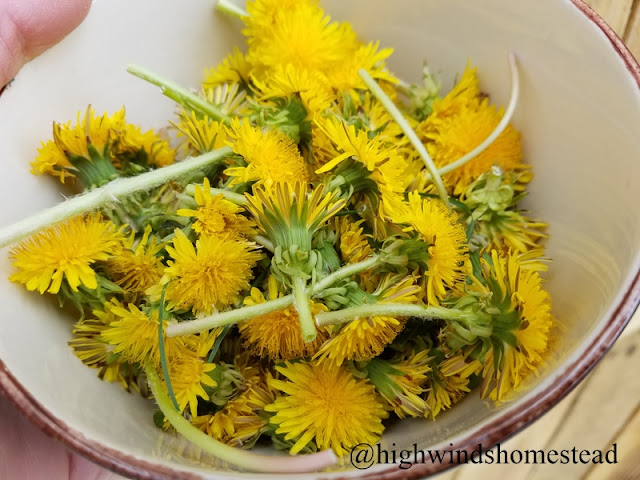
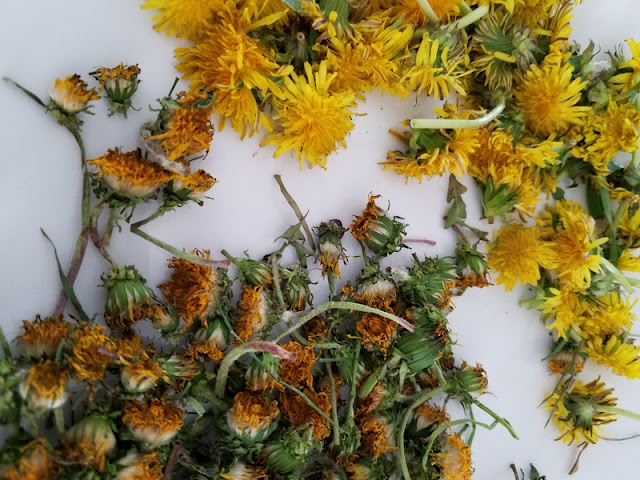
I simply walk around my foraging area and snap the flower heads off and put them in a bowl or basket. When I get back home, I rinse them quickly and then spread them out on paper or cloth towel for a couple of days. This allows them to dry out just a bit, as Dandelions are very 'wet' in nature and I don't want my salve to turn rancid because of the excess moisture.


Once the Dandelions are semi dry - they are ready to be used. I prefer the solar infusion method, but in a pinch I will use the oven or crock pot to create the heat I need. I fill a quart sized jar half to two thirds full of the herbs I am using. For this balm {or salve} I am using Dandelions and Plantain. The Plantain has already been completely dried.

Then cover the dried herbs with your oil of choice, such as; olive oil or almond... sunflower oil even. Next set the jar in a sunny location and allow the infusion to happen - please see the links below for more method details. After the desired time has passed to allow for the botanical benefits to transfer from the herbs to the oil, drain and remove the spent herbs. Reserving the medicinal oil for your balm or salve creation.


Basic Recipe Ratio's for Balm/Salve Making: Mix together the desired 'parts' of the medicinal oil to beeswax. Make sure both items are warm, this will help with the blending and thus create a smoother consistency. While in the warm, melted stage, pour the balm into the containers of your choice. Let your balm cool and set, then label and date with the ingredients. I also like to add what the salve, or balm is used for too, especially if I am gifting it.

1 Part Beeswax to 3 Parts Medicinal Oil = firm salve
1 Part Beeswax to 4 Parts Medicinal Oil = soft balm/salve


I am looking forward to using this balm on my - very dry - garden hands and reaping the benefits of Dandelion and Plantain. Go ahead, and give it a try! However, if you are not up for making it yourself or have a desire to support small businesses, please keep us in mind.


Recommended Resources:

The Highwinds Homestead & Me

This is where I am suppose to share a little about myself and my blog, yikes! How on earth can you share the whole {encompassing} beauty of life, even for one person, on a single {about} page? I don't believe one can even come close...

But as a child, my favorite things to do were to run bare foot through the pastures of my great uncles farm. To slosh in the creeks and play in the fields with my brothers. From climbing apple trees to washing my hair in the rain. The oldest of three, and only girl - I was nurtured by a woman who was {eco} before {eco} was in. We often camped under the stars, gathered fruits of all kinds, and each of us watched the entire process of animal butchering before we were able to reach the steering wheel.

In my late teen years, I began a fifteen year long career in the health care sector, specifically in Long Term Care. Where my focus was {serving} the elderly population with cognitive impairments such as Alzheimer's. I served as a Nursing Assistant, Recreational Assistant, then as a Recreation Director and Volunteer Coordinator. I enjoyed working with people, and their individuality. It was there that {life} became so very precious to me.

It was also during that season when I met {Yeshua} Jesus, the Creator of my life's tapestry. My life and my {self} have never been the same. I am a daughter, a wife, a mother of three - one of whom I home educated from the fifth grade to graduation, I am a sister and a friend, but most importantly I am {Redeemed}.

Welcome to my online home, where I share my endearments of: agrarian living, the farming of faith and the collecting of hope. Where I take snap shots of the small things and write about natural living, gardening and the pursuit of my holistic education.

The Highwinds Homestead - here we Simply Cultivate Life.

Thank you for stopping by & Enjoy.


- I also confess that I have a strong admiration for chickens and coffee.

Flowerfetti / a simple eco friendly confetti

Hello friend - I am here to share with you a wonderful way to use up those expired herbs that you have tucked in the back of your cupboard.

Flower ~ fetti 
A friend of mine's daughter is getting married, and I was invited to be one of the photographers, and help with the wedding cake. During one of our conversations I suggested creating a special blend of flower-fetti for the exit toss. Basically an eco version of the traditional practice, yet full of fall colors - thus making it perfect for a Sukkot wedding.

Sukkot weddings are at the top of my list as extra special, one of the reasons being the beautiful symbolism that is wrapped into this eight day celebration. Of course all weddings are extra special and beautiful because I believe that weddings are to be Holy business.


Fall Flower-fetti Recipe: {using dried, spent or old herbs to create your special blend}
  • Hibiscus - this was put through a small blender to create smaller pieces
  • Chamomile - offers a strong floral scent to the exit toss
  • Calendula Petals - the main giver of color in my blend
  • Lemon Balm - used for hints of green and supports a well rounded scent
  • Rose Petals - used for color and scent support
  • Lavender Petals - I would have used the buds, however what I had on hand were leaves

I made sure each of my herb choices were dry, and chopped into small - safe tossing pieces. Then I added all of them into a large bowl and mixed well. Once the fetti was well blended, I bagged the mixture in wedding favor bags and tied up them up with a ribbon. To make sure the fetti remains dry, until the special day, I poked a few holes along the sides of the bag with a pin. Creating very small air holes for breathing ability.


There you have a fall, floral supported fetti that is simply beautiful.