Community within Humanity: filling another's cup while pouring out

Two things stand out to my heart as pillars from last week. Indeed, there were more, but these two things in particular are sort of tied together, yet uniquely different.

The first is a woman, in the range of seventy plus, who cannot have a variety of food ingredients, including vinegar. Searching for an organic, avocado based mayonnaise. At the end of the conversation, I gave her a recipe to make it herself without vinegar, using lemon juice instead.

The second, a woman in the range of twenty something, who began sharing that during cvid, she started learning how to cook from scratch. At home. This led to her desire to combat some of her health issues naturally, and that gave way to reading ingredients and the preparing of a proper pantry, and home canning.  Twenty minutes into the conversation came her confession of having so much to learn and feeling overwhelmed.

The heart of her husband safely trusts in her;
So he will have no lack of grain.
- Proverbs 31:11

The first lady came back to report that she had made her mayonnaise, and it worked. Her smile was as big as the door she held.  "It was good!" she added. With her finger pointed upward - "thank you. Thank you so much."

The second walked out the door with more local and online resources than she knew how to organize right then. She also had an open invitation to come back, anytime, for help. On both occasions my heart was swelling with joy. Why? Because I had the ability to help someone. Either by making mayonnaise or by encouraging a young wife to keep going. Keep searching. Keeping learning. Taking one thing at a time.

Her passion for pantry organization and learning to home can caused me tears of gratitude... it made me feel useful. Hopeful. Maybe even needed enough to pour into someone. It did my heart good. It did my heart good to see two separate generations searching for better. Desiring less of the system and less of the insecurities that we are fed. Both being willing to step out of the normalcy of convenience to possibilities endless.

It was so much more than mayonnaise. Much more than pantry organization. This was community investment. This was filling another's cup while pouring myself out.


Blueberry Lemon Balm Tarts / Approximately 50 mg per Tart

I think Blueberries & Lemon Balm pair really well together. When combined into a tart we have a simple recipe for easy sharing with therapeutic dosing, and who doesn't love a good homemade tart with therapeutic dosing? This is a multi-step recipe, but it is worth the process.


The Tart:


2 cups all purpose, organic flour

1 T honey or maple syrup

1 t salt 

2 sticks butter, softened.

1 egg

2 T raw milk

10 grams fresh Lemon Balm leaves

Vanilla caviar from two vanilla beans


To make the dough: in a medium sized bowl, mix together the dry ingredients, then add the honey, butter and egg. Mix well. Add milk and mix until everything is pliable. Divide the dough into half and shape each into rectangles, approximately the same size. Wrap in plastic wrap or waxed paper, and refrigerate for roughly an hour. While the dough is cooling, make the tart filling.


The Filling:

2 cups blueberries

1 t lemon balm tincture

1 ½ T lemon juice

⅓ cup succanat or ¼ cup honey

1 T arrowroot powder

1 T water


*Note: initially I used a standardized tincture with 1:3 ratio, thus equaling 330 mgs total, divide this number by the number of tarts. This dosage can change depending on the strength of your tincture.


To make filling: in a medium saucepan, add all of the filling ingredients - EXCEPT: the Lemon Balm Tincture: Warm and simmer over low to medium heat, stirring often. Once the filling is thickened to jam like constancy, turn off the heat and add the tincture, stir well. Allow the mixture to cool.


To Assemble and Bake Tarts:


  1. Place one piece of the dough on a well-floured area and roll out in a rectangle shape with about ⅛ inch thickness. Repeat with the second piece of dough. Trim so that each sheet of dough is close to the same size.

  2. Cut out of each sheet small rectangles, about three by four inches in size. Setting aside each matching pair, until the dough sheets are used up. My first batch made seven tarts, so this means I had fourteen rectangles.

  3. Working with one pair at a time, place a generous heaping spoonful of the blueberry mixture into the center of the rectangle, and smear to about ¼ of inch of edge. Add the matching dough top and crimp all the edges with a fork. Repeat until each tart is filled.

  4. Note: I measured each filling amount exactly, until I had used all my tart bottoms. Then added my tops. This way I could better track my medicinal application for the Lemon Balm. I wanted a measurable outcome with a purpose. 

  5. Gently place the tarts on a lightly greased baking sheet, pricking the tops a few times with a fork. Preheat your oven to 350, then bake the tarts approximately 30 minutes or until golden brown. 

  6. Remove from the oven and allow to cool. When the tarts are completely cool you can glaze them if you choose. I decided to blend some blueberries and a little cream cheese with a touch of honey, until smooth, then used this to frost my Blueberry Lemon Balm Tarts.


Calendula Cinnamon Scones with Orange Zest

 I wanted to create a medicinal loaf of Calendula Sourdough, because I believe that herbs can be added to the diet to help maintain wellness. Or to make an additional avenue for herbal delivery, especially with children or the aged. When I created my Calendula concentrate for the sourdough, I wasn't thinking of the benefits of Calendula or its potency, and therefore I killed the sourdough lift and loaf.


After some thought and some rethinking, I had success with these Calendula Cinnamon Scones with Orange Zest. This recipe is very forgiving and can be adapted to fit a person's dietary needs. 

Calendula Cinnamon Scones with Orange Zest Recipe

2 cups All Purpose Flour, Unbleached

2 Tablespoons Sucanat Sugar

2 Teaspoons Baking Powder

1/2 Teaspoon Salt

1/2 Teaspoon Baking Soda

1/2 Teaspoon Nutmeg

1/2 Cup Cold Butter

1 Tablespoon of Calendula Powder

1 Tablespoon Cinnamon

Zest of 1 to 2 Oranges, your choice (I used two)

1/4 cup Orange Juice

1/2 Buttermilk, or milk of choice

...

In a medium bowl, mix all the dry ingredients, except the Calendula powder, together. Then cut in the butter until it resembles crumbles. Stir in liquids and then add the Calendula powder, knead smooth, about six to eight times. Pat into eight-inch circle, on slightly floured surface and then divide into eight scones.


Place the scones onto a baking sheet and sprinkle the tops with Calendula petals and sugar. Bake twelve to fifteen minutes at 425. Or until golden brown/done. Option: You can incorporate the Calendula petals into the dough as well, or instead of the tops. Also, you may play around with the Calendula powder here, just add additional liquid for proper consistency. 

This recipe delivers approximately 300 mg of Calendula in eight scones. 


Calendula {Calendula officinalis} is a member of Asteraceae family, related to the Chamomile, Yarrow, and Dandelion. It has many beneficial properties such as helping fight inflammation within mucus membranes, addressing fungal and yeast issues - hence why I think it negatively impacted my sourdough - and is known for its effectiveness with skin issues.

Easy to grow, Calendula often reseeds and thrives in a variety of soils. The blossoms are most used, and if you are interested you may read more about Calendula here. 

Let me know if you make the scones and your thoughts.


In the Way: A Sage Brush Revelation

 My son passed away suddenly in November of 2020, just days after his twenty eighth birthday. From a series of poor choices and a bad case of mistaken identity. I don’t say this lightly, nor do I desire to be offensive. However, I refuse to sweeten the facts to make it easier for us all. Life is beautiful and so very precious. I don’t want to cheapen it. Our choices have consequences and seeds are sown with our actions. Redemption is messy and I believe we need to have hard conversations. But one of the best descriptions I have been able to find during this season of grieving is dryness. 

I would drive along this state, feeling like the terrain on which, my eyes scanned. Barren, dry, crumbly and oh how I longed for a Well Spring. Those New Spring rains. I knew that rain equals growth and without water, things die. I ached in sadness, in the what if's and in the regret. In soils of toxicity, damaging the roots. My roots. Normal, natural – yes, but not fruitful for my mind or my heart. Barren and dry. Not wanting to stand again and being so angry for the place I found myself. 

A few weeks prior to the Feast of Trumpets, I was sitting with my cow Tippy Margaret. She is a gift from God. A gift I tried to refuse. A gift He knew I needed. For her personality and for mine. I was there, sitting with her in a place called Betty Gulch, or what the good old boys call “the high and dry.” Knowing it had been some time since I felt like my prayers had feeling, depth if you will - when I spoke them. In a place, where it had been some time since my Bible readings hit my heart and shook my soul. Sometime since I fed what needed feeding, as I was slowly growing the hardening of a vessel. Looking back now, the most of what I remember there, was the clinging grip I had on my God. On my Redeemer. That literal I know not what the next moment will feel like, and I definitely didn’t want to feel anything. I remember how that place concerned me and wondering if I was gonna make it through this one. It was only by the Grace of God.

 I remember sharing this with my husband, just sobbing trying to find the best description of what I truly felt like inside. I turned my head and stated firmly that I feel like THAT! That sagebrush, as I pointed. Yes, just plain old sagebrush. Nothing fruitful, I didn’t like it and I didn't want to be here. In this place of hard and of hurt. I didn't desire the dry, but I knew nothing on how to fix it. I didn’t know how to fight it. 


I asked God at least a hundred times to help me, to bring the rain... for a new Well Spring. It felt as if He was silent to me. Days turned into weeks, and weeks turned into months and then one night between the cow chewing alfalfa and miles of sagebrush, Abba gave me a gift. Something ignited. Sagebrush.

 Sagebrush may not be a gift at first look, but did you know the evergreen shrub is able to thrive in extremely diverse environments, with its double root system and unique branches and leaves. The first root system lies just beneath the shallow soil. Allowing the plant to soak up sudden rainfall and meltwater before it evaporates. The second root system, the longer and tougher roots push deep into the earth, searching for underground water sources. The holding on roots. 

Sagebrush has both vegetative and reproductive branches, leafy with small yellow blossoms... that bloom in late summer and early fall. When most plants are preparing for winter, the sagebrush is just getting started. After the seeds ripen, the reproductive branching dies – but remains on the main shrub for another year. 

Sagebrush is a survivor, some have been recorded to be a hundred years old. It tends to thrive in areas damaged by overgrazing and over trodden. The leaves have a distinct aroma, and were used by tribal people for a myriad of reasons. Sagebrush. Something I never knew so much about, both academically and now, in the form of God answering my dried heart. In the way He knew I would hear. In the way He knew I would feel. Clouds and Rain began to form. 

The day before we honored Yom Teruah, we were out in the high and dry again. Listening to the cow chew her alfalfa. I was resting on a bucket, leaning against the gate, when I looked over and observed the most beautiful yellowed up sagebrush I have ever seen. Partly, I am sure, was due to the new angle from which I was viewing the world. Another gift, in the form of a promise. 

There will be dry and trying hurts, there will be times of barren and lack fruit luster. Seasons of scarce new shoots and drought. These are seasons and not permanent, even those at times it will feel like the season will never end. Can I tell you that I am now singing in the spring rain? No. Not a full on twirl. But, I am not dry inside… God has answered, and He is faithful. 


I have read these verses so many times, Isaiah 44:1 - 4, even now tears come. I used to think willows were so far away from being like sagebrush. Now not so much, anymore. Do I think these revelations came around Holy days by accident, absolutely not. I know the Almighty divinely disclosed to my heart something I needed, something I asked for… in order to prepare me for the next season. 

This is the time to prepare for rain, the early and latter rains.


Simply Herbal: Thymus Vulgaris

 I believe in using what you have or what you can easily access. I believe in not having to know everything, but what you do know - know well. This includes herbalism. While I am all for learning new things and growing in one's scope of abilities and interests, I don't feel one needs to look to the next 'thing' in order to be wise, effective and able. Let me say it this way: if your herbal knowledge is only of those botanicals that require you to purchase and import from afar, in order to have them in your possession - then you have enabled a middleman... and I am all for cutting out as many of those as possible. It is better to know a handful of herbal remedies well, than to know a little about many.

Which brings me to this series - Simply Herbal - where my goal and hope is to help inspire you to learn, use and possibly grow effective botanicals for your home apothecary. To get to know the simple things effectively and to help encourage a connection to your bioregion and foster confidence in your journey. 

Herbalism is just as much art as it is science, to me it is kind of like baking bread. You have to get your hands in it, to be able to tell what is needed next. For you and for your apothecary. 

Let me introduce you to Thymus Vulgaris // used for intestinal gas; stomach upset, respiratory concerns, heartburn, bronchitis, pertussis, sinus issues and coughs. She is an expectorant, antimicrobial, and often used as an astringent. Thyme in her whole herb form has been used to help a variety of fungal concerns, along with her essential oil. I must state here that while I love and appreciate the use of essential oils, I do prefer whole herbal applications most often. This is due to the various constituents working synergistically with the whole botanical, thus utilizing the plants wholistic benefits verses an isolated compound. 

This doesn't mean I don't use Essential Oils, just that I believe they have a time and a place. That being said, Thymol - is pretty potent in its own right and definitely should have a space in the home.  


Thymus Vulgaris // of the family Lamiaceae // is used within our home in many forms. In the kitchen, a culinary delight with a knowing flavor - we use it in salad oils, baking, in meats and soups. In the apothecary, as a main ingredient for steam inhalation and topical skin oils. In the garden, a pollinator attractant and genuine flowering beauty which is lovely to watch grow. 

Thyme grows well in a sunny, fertile area with a PH near 7.0 and is easily divided once it becomes too big for the area. I usually purchase one plant from a reputable nursery and divide from the mother plant as needed.  

This month we created Thymus Oil for skin concerns that may arise later, culinary Thymus oil for homemade salad dressings and we used dried Thymus for steam inhalation. I also checked on our Thyme plant in the garden, to make sure it was surviving the winter well. Below I will link some simple recipes/applications to get you started, and hopefully share my recipe for Thymus Oil at a later date. 

Thymus Infused Oils for the Kitchen: HERE

Thymus Tincture: HERE

Thymus Vulgaris Essential Oil: HERE

*After years of using essential oils and botanical remedies, I have personally weeded through a lot of fluff and marketing and wasted a lot of money. So, I am extremely picky on what I bring into my home now. I know what things that I am willing to spend money on and what I am not, and I say this because when I share links for companies it is because I have used them. Recipes are another matter. :) 


Hopefully this sharing encourages you to start simple, to start small and to create. As I am able, I will add some of our own recipes and applications. For now, spend some moments learning about Thymus Vulgaris and her benefits, plan some space in your garden for her... she also does well in a pot on the windowsill. 

Til' Next Time...


Family Milk Cow: Tippy Margaret Update

 It is now winter and much has happened in the way of Tippy Margaret. When we purchased her in June of this year, we knew she had been in with a bull for a little while. Thus, hoping she was pregnant. If she had not been, we hope she soon would be - as she was placed with a small herd, with a bull in the mix. 

All that to say that our dreams of having a milk cow come Spring were well under way. Then life happened. We found Tippy to be pregnant, much farther along than conception in May or June. She actually calved mid-October, delivering a bull calf - Angus / American Milking Devon cross - while we were out of state. Life's learning curves are perfectly effective, aren't they?


What does that look like for us now? Well, we are currently calf sharing, with milking attempts being made a few times a week. If I am honest, leasing a spot for your cow and attempting to milk in the wide-open range, with no barn or water access is... difficult at best. We are thankful the calf and mama cow are well and going strong, and I am thankful that Tippy does allow me the opportunity to milk free standing for as long as food remains in the bucket. :)

This process has taught us much in the way of what we will desire once we get land of our own, and until then we will push forward and maybe even get enough milk for our morning coffee. 


Family Milk Cow: Building Trust with Tippy

 I often feel like I am suppose to wait for the time to be ideal, or just right before I leap into something. Sometimes I feel the complete opposite and I just jump, and roll with it. But our newest learning experience was a combination of both. Though we always hoped to have a family milk cow one day, we just figured it would have to wait until we were able to actually purchase our homestead. Well, here I am : on this side of the gate, with a registered American Milking Devon, who needs a family in which she can be a milk cow. 


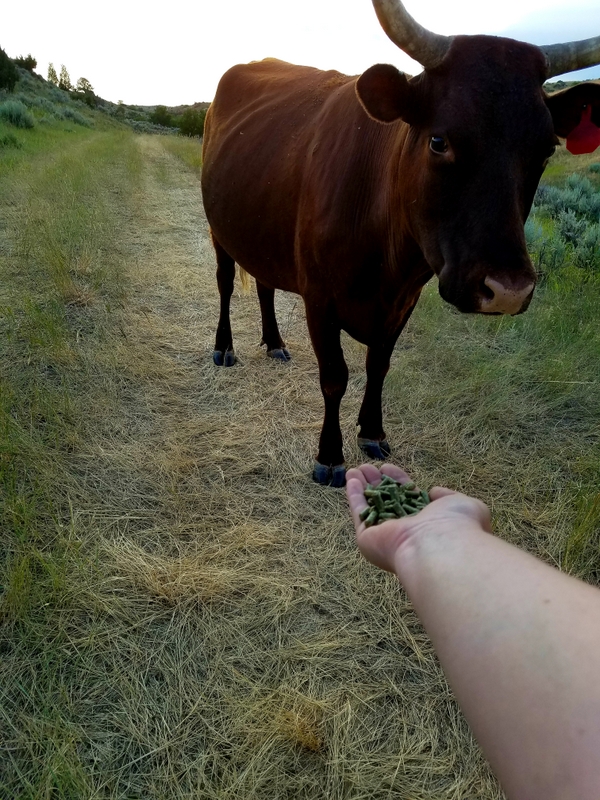
Her name is Tippy, and she has been hanging with range cattle for a bit. Apparently, she has some mood issues at times - but who doesn't. Right now I am giving her lots of grace considering she just left her familiar herd, found herself with a small new one. Hasn't been milked in a couple years and doesn't know me from Anne.


In just two weeks, we have made some good progress. She will now come at the sound of the alfalfa in the bucket and allows me to rub her head and neck while she is eating. However, Tippy doesn't eat from my hand yet, but I hope to work up to that... 

Right now we are just building trust: getting to know each other - which takes consistency, respect and time.


I am thankful that this isn't my first go around with cows, because I think it would feel rather intimidating to attempt. Admittedly, I am no third generation dairy maid, but I have a pretty solid support and knowledge group around me who would like to see us both succeed. That is a nice place to be standing...


Let's Talk Chickens & Yolk Color

 I wanted to take a moment to talk about some aspects in yolk color, in relation to nutrition, quality and over all chicken health. Not to long ago I shared some of my thoughts on the subject via my IG account. Stating - that while egg yolk color and texture are important, they are not always a good stand alone way to judge a quality laying hen - or her eggs.


These two eggs were laid the same exact day, from hens fed the exact same way... organic feed, organic produce and whole food kitchen scraps. In addition they are given the same segmented pasture system. Yet - these yolks are different. Different in height, color and even in texture. 

Does this mean one is far more superior than the other?

Not really.


The pigment that gives eggs their color is called xanthophylls, and it is often obtained from foods such as corn, alfalfa and beans. It can also be found in green grass and yellow petals. However - the over all nutritional content is not directly linked to the color of an egg yolk in and of it's self.

Did you know that some commercial feed producers put pigment enhancers in their feed to assist in the coloring - these can be synthetic or natural additions like marigold petals. This is done solely for consumer preference, and not nutrition. Except in the area of adding flax meal or other high OMEGA sources to the hen's daily ration, as this practice is showing to increase the omega content per egg laid and can add some variations to egg yolk and texture.

There is some debate that a chicken's breed may effect the color of the egg yolk, or the hen's various hormone cycles at any given time of day. Weather, stress and obviously living conditions play a huge part in over all chicken health and egg yolk color. 

So why two different colors of yolk

I don't have a solid answer, yet - just a couple of theories. But I do know that my girls get the best ingredients, lots of sunlight, garden bugs and greens. I trust that what I put into them will give me some of the best, high quality eggs out there.


While I believe that brightly colored yolks can be one of many indicators for over all health and quality of your hen, and that pastured hens lay the best eggs. I do not believe that one should base an entire dozen quality on egg color alone. I advocate that it is best to know your producer, their practices and why they do what they do.


Simple Sweet Potato Biscuit Recipe

I remember a few years back, when we were living in a friends camper and running produce in southern Kentucky : being invited to share in a Thanksgiving Dinner with new family & friends. She had a family tradition, Sweet Potato Biscuits - actually she had a few traditions. That was one of the things I loved about her, her strong love of family, traditions and God. 

She paid cash for everything, loved to knit and shared heart felt truth by the little light. My husband would bring in the nightly firewood, add a few logs and we would gather around and converse. Just converse and be. I never look at a sweet potato without remembering her, and our time there. 

Well there was the time I had sweet potato ice cream in southern Tennessee...


Simple Sweet Potato Biscuits
5 cups flour - maybe a little less, or a little more - depending on the type of flour
4 t baking powder
1 stick butter
3 cups cooked and mashed sweet potato


Directions: blend the first three ingredients, in a large bowl, using a pastry blend or fork. Then add the three cups of mashed, cooled, sweet potatoes and mix well - with your hands. Shape into biscuits, about one inch think and place on baking sheet. 
Bake at 425 for 15 to 20 minutes, or until done. Remove the biscuits from the baking sheet and serve slightly warm with butter and/or maple syrup. These taste the best with people gathered around.


Her biscuits will always look better than mine, and probably always taste better too, but the season of my life that they represent is pure swelling joy. So even if my pictures were snapped in haste and my recipe posts will never make a cookbook... that is alright with me. I have the memory, that bonded connection... and the ability to pass on a tradition.


Make Your Own Basil Infused Pasta

I was a little nervous at the idea of making pasta, especially when it came time to use the pasta maker. But after that first batch, I am confident in saying - that nervousness was all for nothing! The process of making pasta does have a few 'steps' - however the end result is worth all the effort.


Ingredients: this makes about one pound of pasta

- 2 1/2 to 3 cups Semolina Flour

- 3 Eggs, at room temperature

- Water

- 3/4 cup of Fresh, home grown Basil - washed and air dried

Directions: 

- Form a flour mound with the two and half cups semolina, then form a basin in the middle to receive the eggs.

- Crack the eggs into the basin and slowly start working the flour into your eggs, mixing and kneading by hand - until you form a soft dough ball. This may take eight to ten minutes. * If  your dough feels too dry add some water - a few drops at a time. Until a pliable ball forms.

- Wrap the dough in plastic wrap or place into glass bowl with lid. Let it rest for at least thirty minutes. 


- After the rest, divide the dough into quarters and make into balls, cover the remaining balls that are not in use during the next step.

- Rough flatten your dough piece and run it through your pasta roller, which is to be set on the thickest setting. Fold this dough in half after running it through once, then run it through again. Change the setting to the next setting in line, and repeat this process again - resulting in four passes, two folds and two settings on your machine.

- Next lay your pasta sheet flat and place the air dried basil on the pasta in random places and angles. Going half way in length. Then fold over the remaining half pasta sheet. * The amount of Basil used here is based on personal preference, you can use more or less - depending on desired flavor you would like to achieve.

- Then pass this pasta fold through your roller, on the last setting you used. Take care not to pull your pasta as it passes through the roller. If the pasta is too thick for this setting, set the roller back one and run it through once, making one roller adjustment - and pass through a second time.

- Repeat the process with the remaining pieces of dough, laying the completed pasta sheets out on a floured surface while you are working the others. 


- After all of your pasta sheets are completed, run each one though the noodle adapter or cut into rough noodles by hand. At this point you can hang your pasta to dry or... make Alfredo.


Take a moment and enjoy your home made, basil infused pasta with someone you love... and did you know that Basil provides nutrients such as calcium, magnesium and vitamin K along with a variety of antioxidants. So go ahead - grow that Basil!


Five Notes on Herbal Dosing & Home Preparations

The topic of dosing can be a somewhat controversial subject among modern herbalist. Often times being one the biggest challenges for an herbalist to face. With the numerous herbal preparations, blend potentials and the various dosing guidelines – it could leave one wondering how to choose the best method for success. But the need to address dosing should not be ignored and here's why:


Five Reason's You Should Not Disregard Dosing:
 
  • The standardization of herbal remedies use what is called the '150 pound rule'. Meaning that the recommended doses on the bottle of a standardized supplement are for those individuals weighing an average of one hundred fifty pounds. This means if you weigh more or less than that weight, you will need to dose up or down for the herbal remedy to keep it's standardized effectiveness. Unless otherwise noted.
  • Children offer a whole new complexity. For this reason, there are a variety of 'rules' known among herbalists regarding dosing. I personally am focused on two, attempting to commit them memory, as well as keeping them handy for reference. These are known as Clark's Rule and Freid's Rule - you can read more about pediatric dosing guidelines and the formula here. Freid's Rule – similar to Clark's – is for infants and small children.
  • Counting drops doesn't always offer the same precise measurement and dose. This is because a drop can vary in remedy strength, due to dropper size and liquid viscosity. It's often fine for home use, with safe herbs. However, it's wise to remember that it is not precise and that drop dosing, when used, should be utilized in the metric system. 
  • No concern for the strength of a herbal remedy, the quality of the herbal matter or even accurate dosing can result in either dangerous overdosing or inadequate usage. One factor at play here is the use of whole herbs vs. liquid extracts. Whole herbs must first be broken down by the digestive system before they are available for the body to use. The bodies ability to break down the herb effects the bodies ability to absorb the supplement. This is just one element to consider when dosing and/or making preparations. 
  • The method of extraction is another important factor to consider in dosing, one reason for this is because using alcohol with water-soluble compounds, such as mucilage or tannins, creates a dilution in the alcohol. Resulting in a lower concentration or potency of the remedy. This in turn effects dosing.

These note highlights were from my first herbalist course, and I have carried them with me over the years. Solid reminders as I grow and a new season approaches. Encouraged by the next step in my herbal education.


Please Remember: I am not a Doctor, nor a Medical Advisor - these are simply educational notes from my own gleaning.

Homemade Coffee Filters & Simple Vanilla Syrup

For a season I worked as a Barista in a small coffee shop out west, I really really enjoyed that job. There is actually a lot to learn about coffee and the proper brewing thereof. I remember having to watch a video called Coffee 101, which was very similar to this style. In addition to having multiple hours of hands on training before I was allowed to fly solo. I am thankful for the instruction, even now, because you do not want to be the girl to mess up a Monday morning coffee fix.


Now my coffee making endeavors are in the service of family, friends & hospitality and vary slightly in preparation. Recently I made up some reusable coffee filters for my coffee cone from some muslin - by simply tracing my last paper filter on the fold, and stitching along the sides. I then made a small loop hanger on one end, which allows for the filter to hang dry after rinsing. I also blanket stitched along the top of the filters to give a more finished look, which was done before the actual side stitching and the hoop addition.


I also like to use a cold brew coffee sock, like the one shown here. This was a gift from a friend, whom shared her pattern with me. This coffee sock fits a gallon or half gallon jar just perfectly. The sock measurements are approximate as shown in the photo - and the stitching is beautifully simple.


How I Make Cold Brew Coffee: you will need to play with the recipe to find your desired strength

~ Place about 1/2 to 3/4 cup of coarsely ground beans into your coffee sock, place the sock in the neck of your jar. Fill the half gallon jar with water, allowing the water to flow through the coffee sock. Draw up the strings to seal the sock and place the lid on the jar, with the sock string hanging out. Let rest for twelve to eighteen hours and remove the sock. Store cold brew in the fridge. Recycle the coffee grounds to the garden or compost. Rinse the coffee sock and hang dry.

Summer days I drink my coffee two ways - in the morning it's hot and bullet proof in composition. In the afternoon, if I desire a cold frappe or iced coffee I reach for my cold brew and touch it up with a little simple vanilla syrup. 


Simple Vanilla Syrup

½ cup coconut sugar
½ cup water
1 T vanilla extract

*Bring the water and sugar to a boil, simmer over low heat until thicker. Remove from heat and add your vanilla extract. Stir. Let cool and store in a glass jar in your frid - use as needed.

How to Make a Wall Mount Cast Iron Hanging Rack

I know I am not the only one who loves to spend time on Pinterest, so many ideas and inspiring how to's one could easily get carried away. But with a little discipline and budget wisdom, along with a strong do it yourself attitude... oh the possibilities!

I also know, I am not the only who appreciates good ol' cast iron. Though loving it as I do, I will confess it takes up a lot of space in my kitchen cupboards... and this is where Pinterest came in. It didn't take me long to find my inspiration. However, the link with the picture on Pinterest, did not lead me to the actual instructions for the hanging rack that inspired me. So - I did my best to recreate something similar, based on my preferences and a picture.


I decided to use 1 x 2's to form a base on my wall, the long sides are five feet in length, and the short top and bottoms are twenty inches. Each length side is screwed directly into the wall studs. Now before I go any further, I will say two things... one - I am NOT a carpenter, and two - the house is almost one hundred years old. :)

The 1 x 4 's are cut to thirty inches, then screwed into the one by two and wall stud - with two and half inch black screws. My local hardware store was having a special for all Pinterest projects, they were offering free services on things like; cutting the wood and threading my pipe. *Please, stain the wood before mounting to the frame, in a well ventilated area.


The pipe, the most pricey portion of this project, is a half inch in diameter. I used six feet total, being cut into two foot sections and threaded on each end. Add an elbow and floor flange to each end, then tighten everything down securely. Then, I spray painted them with a flat black, suitable for metal, spray paint.

Once they were dry, I mounted them on my wooden back drop - with the distance between them being relative to what I was going to hang. Meaning the bottom rungs are equally spaced, and the top rung intentionally has a smaller hanging space. I did this to help insure that the smaller cast iron was hung near the top and the heaviest pieces at the bottom.


My hooks are from bungee cords. Yes, I could have ordered them from Amazon... but somethings I just prefer to work out locally. After visiting three hardware type stores, it clicked to give these a try. Sure enough, the hooks on a bungee cord fit perfectly on a half inch pipe, thus I spent about three dollars for six hooks.


In hind sight, I think I would like the wooden back drop flush against the wall, and possibly frame it in along the edges. But who's to say that won't come later, as this project has led to many ideas for our kitchen remodel.


Wall Mount Pinterest Idea's {HERE}

A Simple Effective & Natural Wood Sealant

My recent cast iron creative inspired me to use some of my effective and natural wood sealant, which honestly is just another variation of my wood balm recipe. But - it really is - effective and natural - so why not!

With this project I used 3 parts coconut oil and 1 part bee's wax, along with about 5 drops cedar-wood essential oil. Mainly for the aroma - I think, as I tend to have a preference for earthy, woodsy type essential oils in many of my home uses.


After I melted the coconut and bee's wax, I blended them together in a glass jar, then I  added my essential oil drops. Blending again. Then taking a soft, but sturdy cloth - I rubbed generous amounts of my natural sealant into the stained wood.

This really made the wood 'pop' and heighten the look of the flat black pipe, and hanging cast iron. Plus it smelled just - lovely. I love the small batches, not only cutting down on waste but time as well.