Showing posts with label Home Apothecary. Show all posts

Blueberry Lemon Balm Tarts / Approximately 50 mg per Tart

I think Blueberries & Lemon Balm pair really well together. When combined into a tart we have a simple recipe for easy sharing with therapeutic dosing, and who doesn't love a good homemade tart with therapeutic dosing? This is a multi-step recipe, but it is worth the process.


The Tart:


2 cups all purpose, organic flour

1 T honey or maple syrup

1 t salt 

2 sticks butter, softened.

1 egg

2 T raw milk

10 grams fresh Lemon Balm leaves

Vanilla caviar from two vanilla beans


To make the dough: in a medium sized bowl, mix together the dry ingredients, then add the honey, butter and egg. Mix well. Add milk and mix until everything is pliable. Divide the dough into half and shape each into rectangles, approximately the same size. Wrap in plastic wrap or waxed paper, and refrigerate for roughly an hour. While the dough is cooling, make the tart filling.


The Filling:

2 cups blueberries

1 t lemon balm tincture

1 ½ T lemon juice

⅓ cup succanat or ¼ cup honey

1 T arrowroot powder

1 T water


*Note: initially I used a standardized tincture with 1:3 ratio, thus equaling 330 mgs total, divide this number by the number of tarts. This dosage can change depending on the strength of your tincture.


To make filling: in a medium saucepan, add all of the filling ingredients - EXCEPT: the Lemon Balm Tincture: Warm and simmer over low to medium heat, stirring often. Once the filling is thickened to jam like constancy, turn off the heat and add the tincture, stir well. Allow the mixture to cool.


To Assemble and Bake Tarts:


  1. Place one piece of the dough on a well-floured area and roll out in a rectangle shape with about ⅛ inch thickness. Repeat with the second piece of dough. Trim so that each sheet of dough is close to the same size.

  2. Cut out of each sheet small rectangles, about three by four inches in size. Setting aside each matching pair, until the dough sheets are used up. My first batch made seven tarts, so this means I had fourteen rectangles.

  3. Working with one pair at a time, place a generous heaping spoonful of the blueberry mixture into the center of the rectangle, and smear to about ¼ of inch of edge. Add the matching dough top and crimp all the edges with a fork. Repeat until each tart is filled.

  4. Note: I measured each filling amount exactly, until I had used all my tart bottoms. Then added my tops. This way I could better track my medicinal application for the Lemon Balm. I wanted a measurable outcome with a purpose. 

  5. Gently place the tarts on a lightly greased baking sheet, pricking the tops a few times with a fork. Preheat your oven to 350, then bake the tarts approximately 30 minutes or until golden brown. 

  6. Remove from the oven and allow to cool. When the tarts are completely cool you can glaze them if you choose. I decided to blend some blueberries and a little cream cheese with a touch of honey, until smooth, then used this to frost my Blueberry Lemon Balm Tarts.


Calendula Cinnamon Scones with Orange Zest

 I wanted to create a medicinal loaf of Calendula Sourdough, because I believe that herbs can be added to the diet to help maintain wellness. Or to make an additional avenue for herbal delivery, especially with children or the aged. When I created my Calendula concentrate for the sourdough, I wasn't thinking of the benefits of Calendula or its potency, and therefore I killed the sourdough lift and loaf.


After some thought and some rethinking, I had success with these Calendula Cinnamon Scones with Orange Zest. This recipe is very forgiving and can be adapted to fit a person's dietary needs. 

Calendula Cinnamon Scones with Orange Zest Recipe

2 cups All Purpose Flour, Unbleached

2 Tablespoons Sucanat Sugar

2 Teaspoons Baking Powder

1/2 Teaspoon Salt

1/2 Teaspoon Baking Soda

1/2 Teaspoon Nutmeg

1/2 Cup Cold Butter

1 Tablespoon of Calendula Powder

1 Tablespoon Cinnamon

Zest of 1 to 2 Oranges, your choice (I used two)

1/4 cup Orange Juice

1/2 Buttermilk, or milk of choice

...

In a medium bowl, mix all the dry ingredients, except the Calendula powder, together. Then cut in the butter until it resembles crumbles. Stir in liquids and then add the Calendula powder, knead smooth, about six to eight times. Pat into eight-inch circle, on slightly floured surface and then divide into eight scones.


Place the scones onto a baking sheet and sprinkle the tops with Calendula petals and sugar. Bake twelve to fifteen minutes at 425. Or until golden brown/done. Option: You can incorporate the Calendula petals into the dough as well, or instead of the tops. Also, you may play around with the Calendula powder here, just add additional liquid for proper consistency. 

This recipe delivers approximately 300 mg of Calendula in eight scones. 


Calendula {Calendula officinalis} is a member of Asteraceae family, related to the Chamomile, Yarrow, and Dandelion. It has many beneficial properties such as helping fight inflammation within mucus membranes, addressing fungal and yeast issues - hence why I think it negatively impacted my sourdough - and is known for its effectiveness with skin issues.

Easy to grow, Calendula often reseeds and thrives in a variety of soils. The blossoms are most used, and if you are interested you may read more about Calendula here

Let me know if you make the scones and your thoughts.


Simply Herbal: Thymus Vulgaris

 I believe in using what you have or what you can easily access. I believe in not having to know everything, but what you do know - know well. This includes herbalism. While I am all for learning new things and growing in one's scope of abilities and interests, I don't feel one needs to look to the next 'thing' in order to be wise, effective and able. Let me say it this way: if your herbal knowledge is only of those botanicals that require you to purchase and import from afar, in order to have them in your possession - then you have enabled a middleman... and I am all for cutting out as many of those as possible. It is better to know a handful of herbal remedies well, than to know a little about many.

Which brings me to this series - Simply Herbal - where my goal and hope is to help inspire you to learn, use and possibly grow effective botanicals for your home apothecary. To get to know the simple things effectively and to help encourage a connection to your bioregion and foster confidence in your journey. 

Herbalism is just as much art as it is science, to me it is kind of like baking bread. You have to get your hands in it, to be able to tell what is needed next. For you and for your apothecary. 

Let me introduce you to Thymus Vulgaris // used for intestinal gas; stomach upset, respiratory concerns, heartburn, bronchitis, pertussis, sinus issues and coughs. She is an expectorant, antimicrobial, and often used as an astringent. Thyme in her whole herb form has been used to help a variety of fungal concerns, along with her essential oil. I must state here that while I love and appreciate the use of essential oils, I do prefer whole herbal applications most often. This is due to the various constituents working synergistically with the whole botanical, thus utilizing the plants wholistic benefits verses an isolated compound. 

This doesn't mean I don't use Essential Oils, just that I believe they have a time and a place. That being said, Thymol - is pretty potent in its own right and definitely should have a space in the home.  


Thymus Vulgaris // of the family Lamiaceae // is used within our home in many forms. In the kitchen, a culinary delight with a knowing flavor - we use it in salad oils, baking, in meats and soups. In the apothecary, as a main ingredient for steam inhalation and topical skin oils. In the garden, a pollinator attractant and genuine flowering beauty which is lovely to watch grow. 

Thyme grows well in a sunny, fertile area with a PH near 7.0 and is easily divided once it becomes too big for the area. I usually purchase one plant from a reputable nursery and divide from the mother plant as needed.  

This month we created Thymus Oil for skin concerns that may arise later, culinary Thymus oil for homemade salad dressings and we used dried Thymus for steam inhalation. I also checked on our Thyme plant in the garden, to make sure it was surviving the winter well. Below I will link some simple recipes/applications to get you started, and hopefully share my recipe for Thymus Oil at a later date. 

Thymus Infused Oils for the Kitchen: HERE

Thymus Tincture: HERE

Thymus Vulgaris Essential Oil: HERE

*After years of using essential oils and botanical remedies, I have personally weeded through a lot of fluff and marketing and wasted a lot of money. So, I am extremely picky on what I bring into my home now. I know what things that I am willing to spend money on and what I am not, and I say this because when I share links for companies it is because I have used them. Recipes are another matter. :) 


Hopefully this sharing encourages you to start simple, to start small and to create. As I am able, I will add some of our own recipes and applications. For now, spend some moments learning about Thymus Vulgaris and her benefits, plan some space in your garden for her... she also does well in a pot on the windowsill. 

Til' Next Time...


Five Notes on Herbal Dosing & Home Preparations

The topic of dosing can be a somewhat controversial subject among modern herbalist. Often times being one the biggest challenges for an herbalist to face. With the numerous herbal preparations, blend potentials and the various dosing guidelines – it could leave one wondering how to choose the best method for success. But the need to address dosing should not be ignored and here's why:


Five Reason's You Should Not Disregard Dosing:
 
  • The standardization of herbal remedies use what is called the '150 pound rule'. Meaning that the recommended doses on the bottle of a standardized supplement are for those individuals weighing an average of one hundred fifty pounds. This means if you weigh more or less than that weight, you will need to dose up or down for the herbal remedy to keep it's standardized effectiveness. Unless otherwise noted.
  • Children offer a whole new complexity. For this reason, there are a variety of 'rules' known among herbalists regarding dosing. I personally am focused on two, attempting to commit them memory, as well as keeping them handy for reference. These are known as Clark's Rule and Freid's Rule - you can read more about pediatric dosing guidelines and the formula here. Freid's Rule – similar to Clark's – is for infants and small children.
  • Counting drops doesn't always offer the same precise measurement and dose. This is because a drop can vary in remedy strength, due to dropper size and liquid viscosity. It's often fine for home use, with safe herbs. However, it's wise to remember that it is not precise and that drop dosing, when used, should be utilized in the metric system. 
  • No concern for the strength of a herbal remedy, the quality of the herbal matter or even accurate dosing can result in either dangerous overdosing or inadequate usage. One factor at play here is the use of whole herbs vs. liquid extracts. Whole herbs must first be broken down by the digestive system before they are available for the body to use. The bodies ability to break down the herb effects the bodies ability to absorb the supplement. This is just one element to consider when dosing and/or making preparations. 
  • The method of extraction is another important factor to consider in dosing, one reason for this is because using alcohol with water-soluble compounds, such as mucilage or tannins, creates a dilution in the alcohol. Resulting in a lower concentration or potency of the remedy. This in turn effects dosing.

These note highlights were from my first herbalist course, and I have carried them with me over the years. Solid reminders as I grow and a new season approaches. Encouraged by the next step in my herbal education.


Please Remember: I am not a Doctor, nor a Medical Advisor - these are simply educational notes from my own gleaning.

A Simple Plantain Poultice

Plantain was one of the first herbs my mama ever exposed me to, via a bee sting. This experience included saliva, a kiss and something that resulted in a green mushy paste. Like her, it was one of the first herbs that I exposed my little girl to.


It grows just about everywhere and is a 'foundation' herb in my home apothecary. During the season's of growth, I pick it early in the morning, before the sun has warmed the leaves to hot. Or in the evening, when the leaves have cooled to chill. Most of the time I dry them by laying them out flat after a quick rinsing bath.


When the harvest is dry, my herbal canvas is ready... then comes a cultivation of color in hues of green and oil. Nutrient dense, known for the ability to draw and to purify, powerful in standing alone or being supportive in teamwork.


For a Plantain Poultice:

You will need a handful of fresh, young plantain leaves. Or whatever amount is needed to cover the area where the poultice will be applied. Mush them. Unless it's very close family members, please do not put them in your mouth and chew them up to use... this should be reserved only for those mama's needing to deal with an issue quickly.

Trust me.

Next - apply this green mush to the affected area... and cover with a cloth wrap or bandage. After roughly thirty minutes, remove and repeat. Use as needed. I often buy cotton sheets from the thrift stores and wash them really well, dry them in the sun and then rip them into strips for this very use. 


Please Note: I do not treat, diagnose, nor imply disease/illness prevention. I am an herbalist and not a physician, my statements have not been approved nor evaluated by the FDA. I have received formal education from Vintage Remedies, and am currently saving my dimes to pay for my next learning experience.

Creating a Personal Materic Medica

Between making a home and creating family goals for the upcoming year - I have been rekindling my herbal interests. Somewhere amid reading Homegrown Healing by Christine Dalziel and Botanical Portraits by Ann Swan desire and inspiration struck. Then when I signed up for the Herbal Academy's free Herbal Materia Medica course, that inspiration took hold of my dusty nature journal turned personal 'materia medica' and set my pencils to action.


Paired with a lettering reference from the local library and I had all the tools I needed to begin.


My art class instruction from high school is a bit rusty, but the joys of sitting with the botanical subject and creating a personalized medica and gardening journal has been so healing. This creative is also helping my educational recall and giving me steam to continue to save for my next course.

Have you began your own personalized materia medica?


Frankincense & Myrrh Foot Rub

Playing for me can be anything from gardening to creating herbals in the kitchen. It calms my mind and expresses the herbalist within my heart. Most of the time I create for others, little botanical treasures for health and hope. But this week I created a personalized batch Frankincense & Myrrh foot rub.


The Recipe:
  • 1/4 cup of shea butter
  • 2 T coconut oil
  • 2 T olive oil {or almond}
  • 1 T {about an ounce} beeswax, grated
  • 15 drops of Frankincense essential oil
  • 10 drops of Myrrh essential oil

Directions: melt the beeswax and shea butter over low heat, add the coconut & olive oil. Blend well. When completely melted, remove from heat source and add the essential oils. Blend again. Pour into a small jar or metal tin. Let cool & enjoy!

The Making of Dandelion and Plantain Salve

Dandelions have so many uses, besides being perfect for bees and other pollinators. A simple google search gives us plenty of ideas for creativity and education. However be wise and use discernment when picking a gleaning location, please stay away from areas with pesticide use and along side the road ways.


But Why Dandelion? {Taraxacum officinale}

Besides being widespread and easy to identify, Dandelions are easy to grow and semi easy to harvest. A win win for the beginner and the expert. All parts of the plant can be used, the root for things like - stimulating bile production and as a liver tonic, the leaf for things like - water retention and kidney problems. The flowers can be saute`d for dinner additions or in our case... used in a balm for sore muscles, chapped skin and stiff joints.

And Plantain? {Plantago major}

Again, plantain is wide spread, easy to identify and comes with multiple uses as well. Dandelion and Plantain are great herbs for children to learn basic salve making skills with as well as botanical identification. Plantain is my - most used - go to - for skin issues, because of it's ability to effectively nurture the skin as a whole. From fighting infection to drawing out skin toxins and soothing scrapes, bites and stings. Plantain is priceless. Together - they are gift to be reckoned with.

"Plantain also has styptic and hemostatic properties, meaning that it can help check bleeding." - Rosemary Gladstar, Medicinal Herbs - A Beginner's Guide, page 189

How To Harvest Dandelions & Prepare Them for Salve Making:

I simply walk around my foraging area and snap the flower heads off and put them in a bowl or basket. When I get back home, I rinse them quickly and then spread them out on paper or cloth towel for a couple of days. This allows them to dry out just a bit, as Dandelions are very 'wet' in nature and I don't want my salve to turn rancid because of the excess moisture.


Once the Dandelions are semi dry - they are ready to be used. I prefer the solar infusion method, but in a pinch I will use the oven or crock pot to create the heat I need. I fill a quart sized jar half to two thirds full of the herbs I am using. For this balm {or salve} I am using Dandelions and Plantain. The Plantain has already been completely dried.

Then cover the dried herbs with your oil of choice, such as; olive oil or almond... sunflower oil even. Next set the jar in a sunny location and allow the infusion to happen - please see the links below for more method details. After the desired time has passed to allow for the botanical benefits to transfer from the herbs to the oil, drain and remove the spent herbs. Reserving the medicinal oil for your balm or salve creation.


Basic Recipe Ratio's for Balm/Salve Making: Mix together the desired 'parts' of the medicinal oil to beeswax. Make sure both items are warm, this will help with the blending and thus create a smoother consistency. While in the warm, melted stage, pour the balm into the containers of your choice. Let your balm cool and set, then label and date with the ingredients. I also like to add what the salve, or balm is used for too, especially if I am gifting it.

1 Part Beeswax to 3 Parts Medicinal Oil = firm salve
1 Part Beeswax to 4 Parts Medicinal Oil = soft balm/salve


I am looking forward to using this balm on my - very dry - garden hands and reaping the benefits of Dandelion and Plantain. Go ahead, and give it a try! However, if you are not up for making it yourself or have a desire to support small businesses, please keep us in mind.


Recommended Resources:

Flowerfetti / a simple eco friendly confetti

Hello friend - I am here to share with you a wonderful way to use up those expired herbs that you have tucked in the back of your cupboard.

Flower ~ fetti 
A friend of mine's daughter is getting married, and I was invited to be one of the photographers, and help with the wedding cake. During one of our conversations I suggested creating a special blend of flower-fetti for the exit toss. Basically an eco version of the traditional practice, yet full of fall colors - thus making it perfect for a Sukkot wedding.

Sukkot weddings are at the top of my list as extra special, one of the reasons being the beautiful symbolism that is wrapped into this eight day celebration. Of course all weddings are extra special and beautiful because I believe that weddings are to be Holy business.


Fall Flower-fetti Recipe: {using dried, spent or old herbs to create your special blend}
  • Hibiscus - this was put through a small blender to create smaller pieces
  • Chamomile - offers a strong floral scent to the exit toss
  • Calendula Petals - the main giver of color in my blend
  • Lemon Balm - used for hints of green and supports a well rounded scent
  • Rose Petals - used for color and scent support
  • Lavender Petals - I would have used the buds, however what I had on hand were leaves

I made sure each of my herb choices were dry, and chopped into small - safe tossing pieces. Then I added all of them into a large bowl and mixed well. Once the fetti was well blended, I bagged the mixture in wedding favor bags and tied up them up with a ribbon. To make sure the fetti remains dry, until the special day, I poked a few holes along the sides of the bag with a pin. Creating very small air holes for breathing ability.


There you have a fall, floral supported fetti that is simply beautiful.


Salve Creative : Dandelion Rose

Looking for an easy, floral salve that will cover many bases. Well here it is: Dandelion Rose. I made this up using hand gathered dandelions from the homestead's back yard and certified organic ingredients for the ones I can not yet grow. Salve basics are 3 parts oil base to 1 part wax and one hundred percent creative science.

Dandelion Rose Salve :


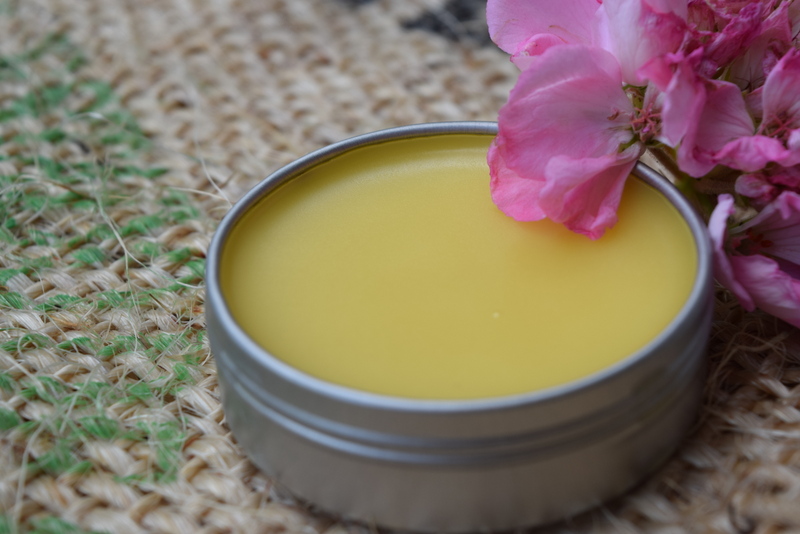
This particular salve is made of : Organic Extra Virgin Olive oil/Sunflower oil infused with: Dandelion {Taraxacum officinale} - Rose {Rosa centifolia}, Local Beeswax, Vitamin E and Rose Geranium Essential oil. It is perfect for use on: chapped & dry hands, sore muscles, over all stiffness and minor scrapes.

I follow the same process with all my salves & balms - changing the ingredients to fit my needs. However, the Rose & Rose Geranium really set this salve apart. The scent being very faint, but present and the blessings of Rose Geranium are not limited to : but - include : soothing skin, being anti fungal, anti viral and anti inflammatory.


The salve making process is often quickly learned and a skill I would encourage you to obtain. However, if you are interested in this salve and have a desire to support small business - I would be happy to make you a tin, while my home grown / home harvested dandelion supplies last that is.


Please Note: this post is for informational purposes only and should not be construed as medical advice. This sharing is not intended to replace medical advice offered by physicians or natural health providers. Please seek your personal provider for questions or concerns - and research information from reliable sources.

Ideas for Common Cold Care

It's that time of year again, germs and bugs abounding. Hopefully I am just in time to share a collective of care practices for the common cold that are often found in our home.


First a simple tea to blend, consisting of a few wonderful herbs that are easy to grow and/or to locate if you need to purchase them. Please be sure your supplier is reputable.
 
  • Chamomile – mild sedative, restlessness
  • Echinacea – immunomodulating, contraindication for auto immune
  • Black Elder – immune stimulant
  • Yarrow – anti-inflammatory, herbal bitter, anti-microbial
  • Peppermint – antitussive, anti-spasmatic
  • Nettle – anti-rheumatic

Directions: blend equal parts of the above dried herbs and store them in a dark, labeled container.  

To use:  simply fill your standard tea ball with your tea blend and place this into your special tea cup. Add six to eight ounces of hot water. Cover. Let the tea steep roughly five minutes or until preferred strength is reach. Sip while hot and tolerable.

*Variation - you could also add some dried orange peel or apple.


Elderberry Tincturesambucus nigra - in our home we use a tincture made with elderberry and brandy most of the time. Hot Toddies with this base offer wonderful night relief. However, when my daughter was younger we made syrups for the sweet element. With a simple internet search you will see that Elderberry Tincture, Extracts and Syrup recipes are everywhere. However, this is my go to because of the solidarity of their educational and resource materials.


Herbal Foot Baths:
 
  • David Hoffman, FNIMH, AHG in Medical Herbalism, page 337 - shares this recipe: Add 1 T mustard powder to 4 pints of hot water – soak feet for roughly ten minutes, twice a day.
  • Nana would say soak your feet in Epsom Salts, for ten to fifteen minutes, dry your feet and apply a vapor rub to the soles and then cover them with cotton or wool socks. Do this prior to going to bed and sleep with your socks on through the night.


Aromatherapy for the Cold: diffusing these essential oils through out the day, especially where you are resting will be beneficial to you and your environment.

  • Melaleuca & Eucalyptus
  • Rosemary & Peppermint

You could also make any of these combinations into a linen spray for your pillow or head rest.

To make a Linen Spray:

Simply mix equal amount of vodka and distilled water - like ¼ C to ¼ C – add 10 to 15 drops of each essential oil in the combination. Add this mixture to a spray bottle, label and date. Shake well before each use. You can adjust accordingly depending on the type of spray bottle you use. We prefer and use glass.

*creative note - I actually use a little less vodka or alcohol and more essential oils.

Steam Inhalation: place about 1/3c of blended herbs OR two drops each of essential oils of Chamomile and Bergamot into a bowl, and pour boiling water over them, then create a tent with an old - but large towel - by draping the towel over your head and around the bowl. Be sure not to let the steam escape. This is best done in a seated position so you can lean over to accommodate the action required... inhale slowly for 5 to 10 min.

A NOTE ON ESSENTIAL OILS: length of time may vary and it is best to start with one drop of each to begin with, and do not use if you are sensitive to the listed essential oils or plants.

In the Kitchen: foods such as onions, garlic, ginger, astralgalus and lemon are great for the common cold and should be added to the diet liberally while sick. Unless those foods listed are contraindicated for your system.

Meals like – chicken soup, made with home made bone broth and astralgalus root would be a great meal. Again, heavy on the garlic and onions if you can tolerate them and remember to avoid sugar as much as possible while sick, as sugar has negative effects on your immune system.

Drink plenty of water, consume lots of vitamin C and get ample rest.

For Nurturing the Soul: it's no fun being sick. However I do find comfort in God's Word. Here are a couple verses I like to think upon or make into cards for me to see throughout the day.

  • Romans 12:12 -  Rejoice in hope, be patient in tribulation, be constant in prayer.
  • Proverbs 31:25 - Strength and dignity are her clothing, and she laughs at the time to come.

I hope you find these ideas helpful and prepped for cold season.